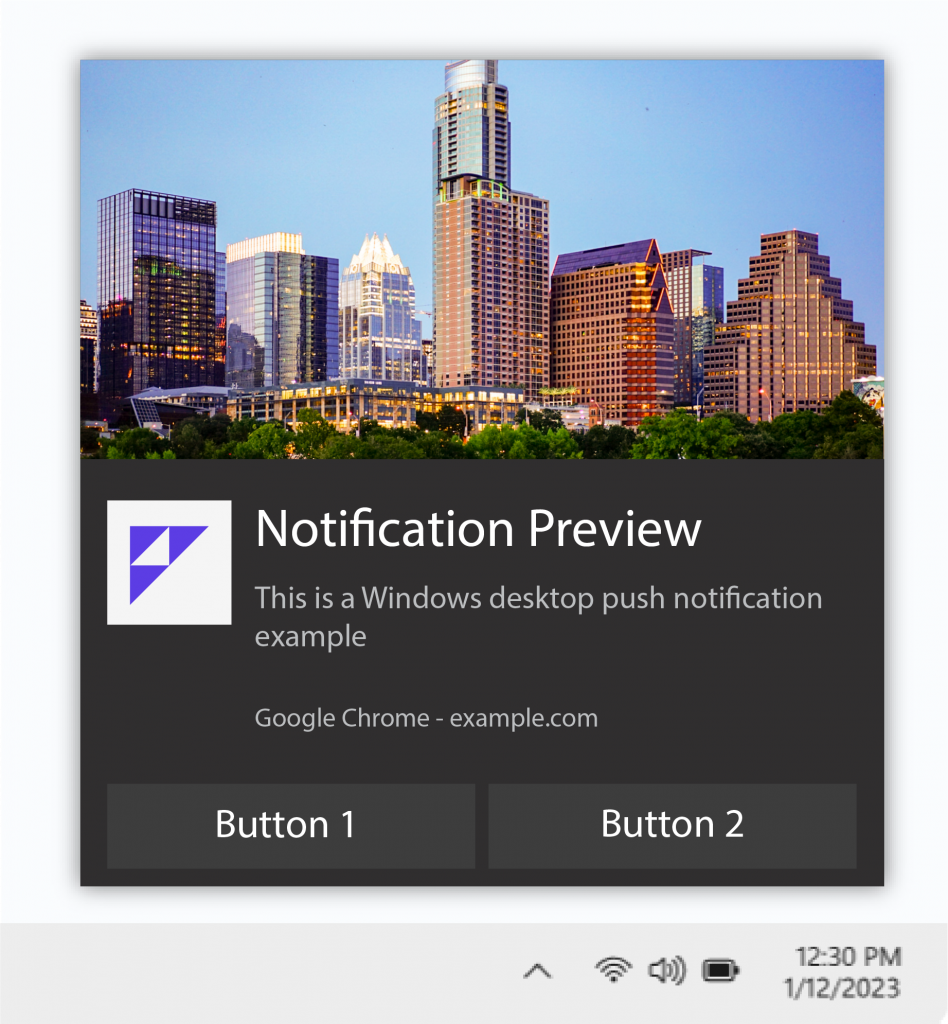
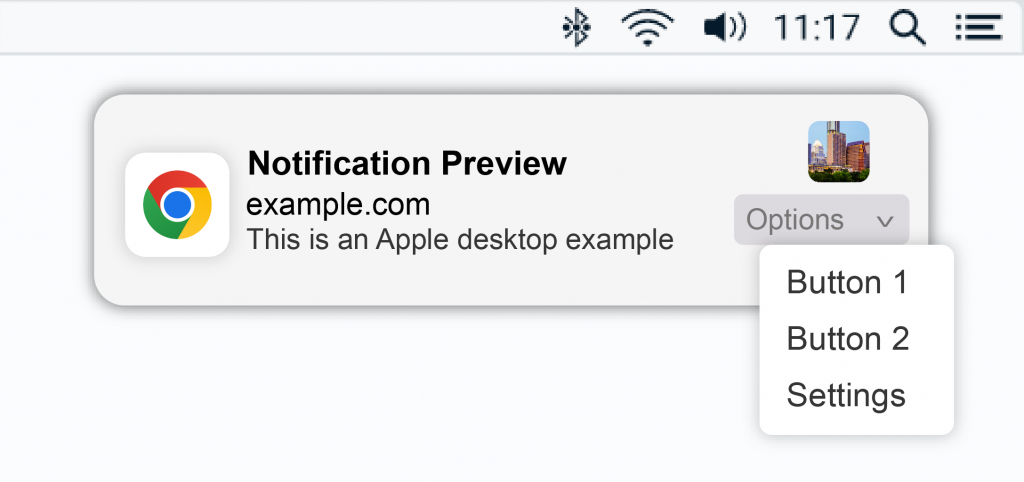
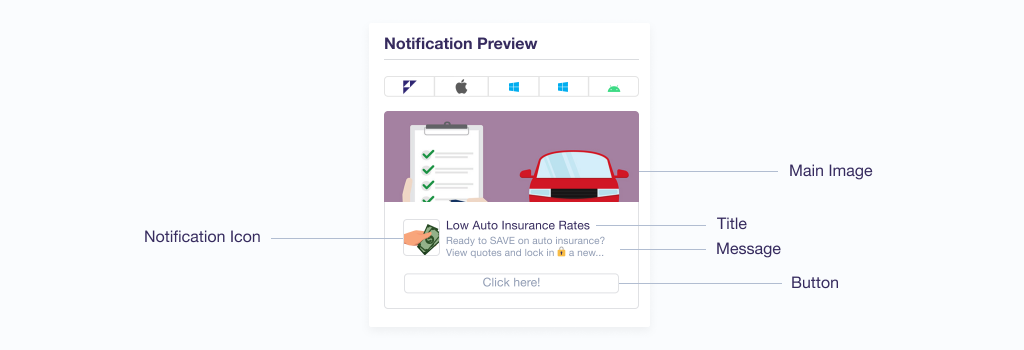
Notification Examples By Device


|
|
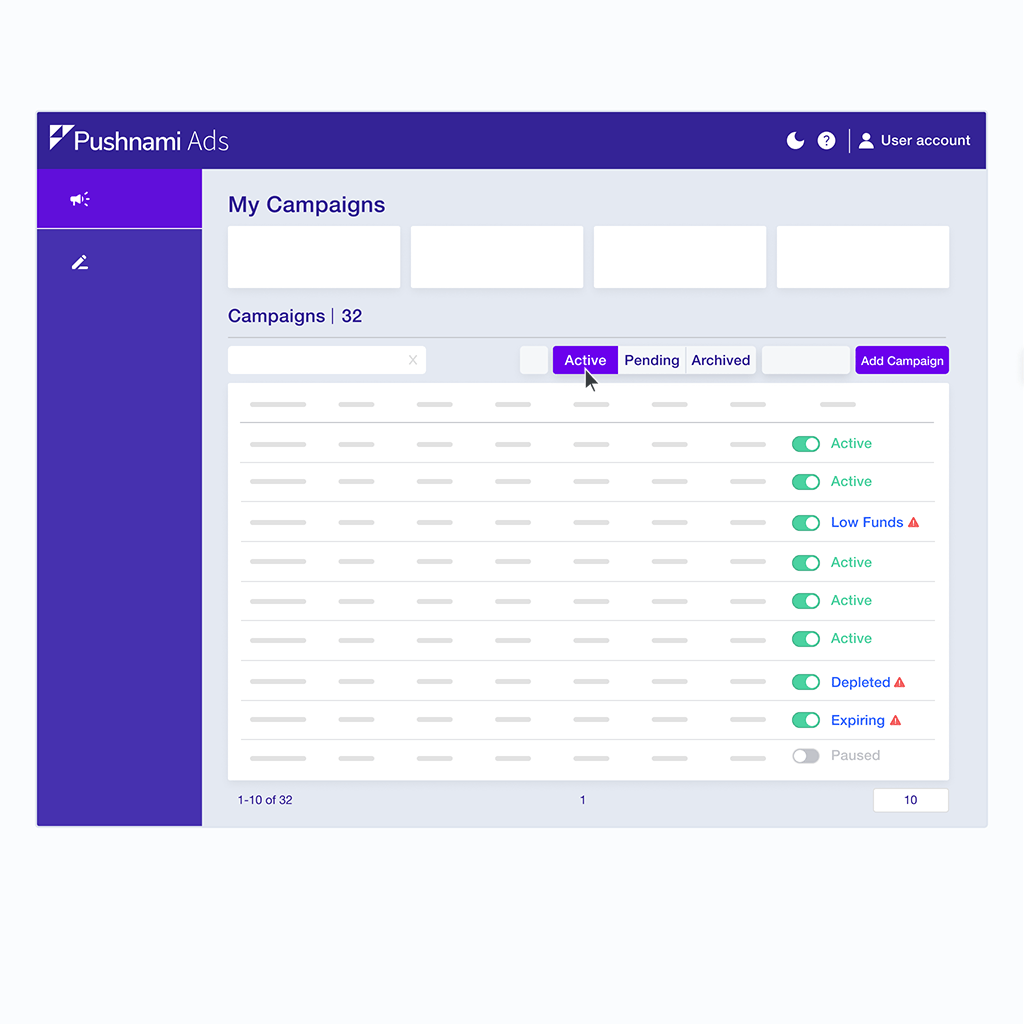
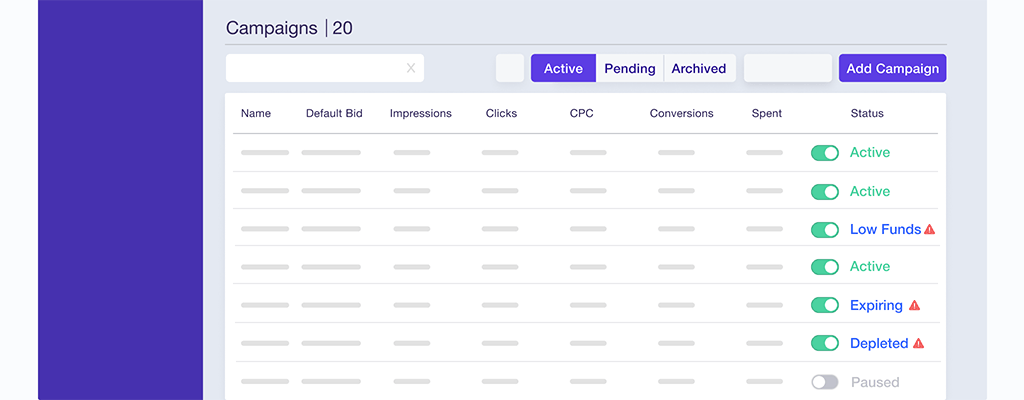
Active |
The campaign is live and running on the network |
|
|
Pending |
The campaign is currently being reviewed by our content review team to ensure it is compliant with our advertising policies |
|
|
Paused |
The campaign is currently paused and not running on the network |
|
|
Rejected |
The campaign is not running and campaign contents are in violation of our advertising policies. The campaign was terminated on Pushnami’s behalf |
|
|
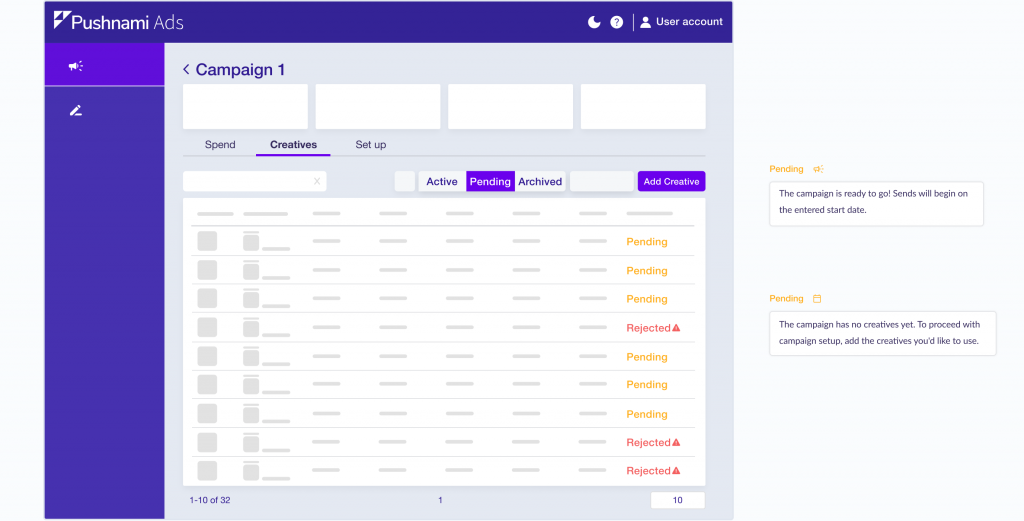
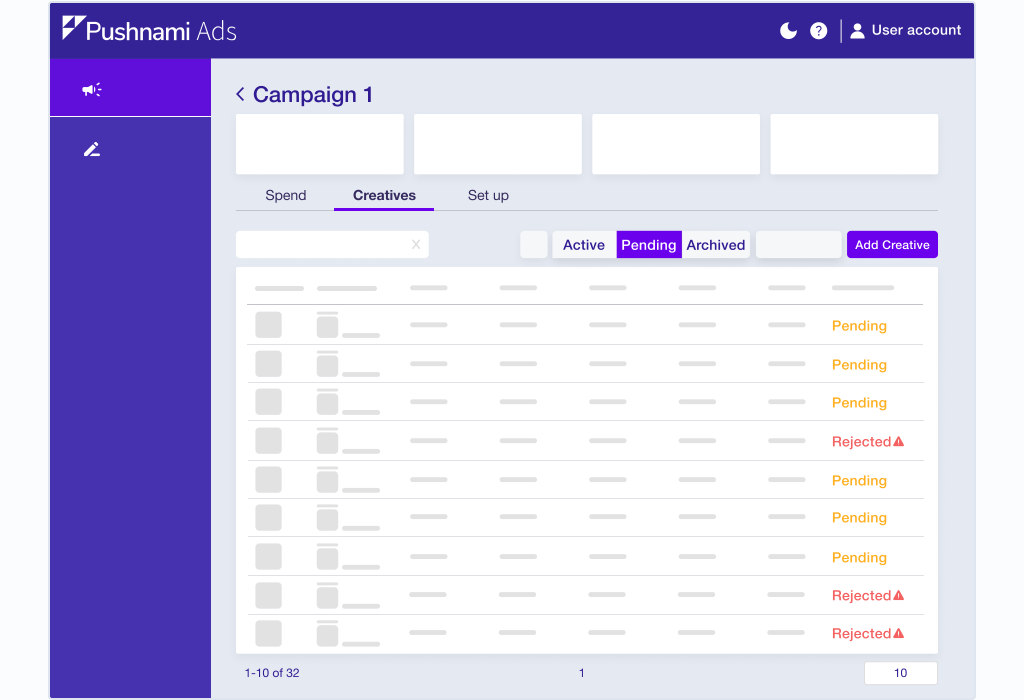
Pending Start Date |
The campaign will start to run on the network on the entered start date defined in the campaign settings |
|
|
Pending Creatives |
A campaign has been created, but there are no creatives added and therefore not sending |
|
|
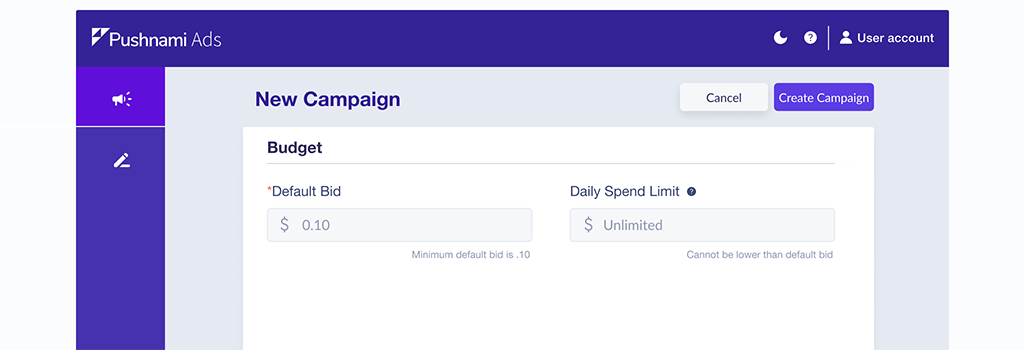
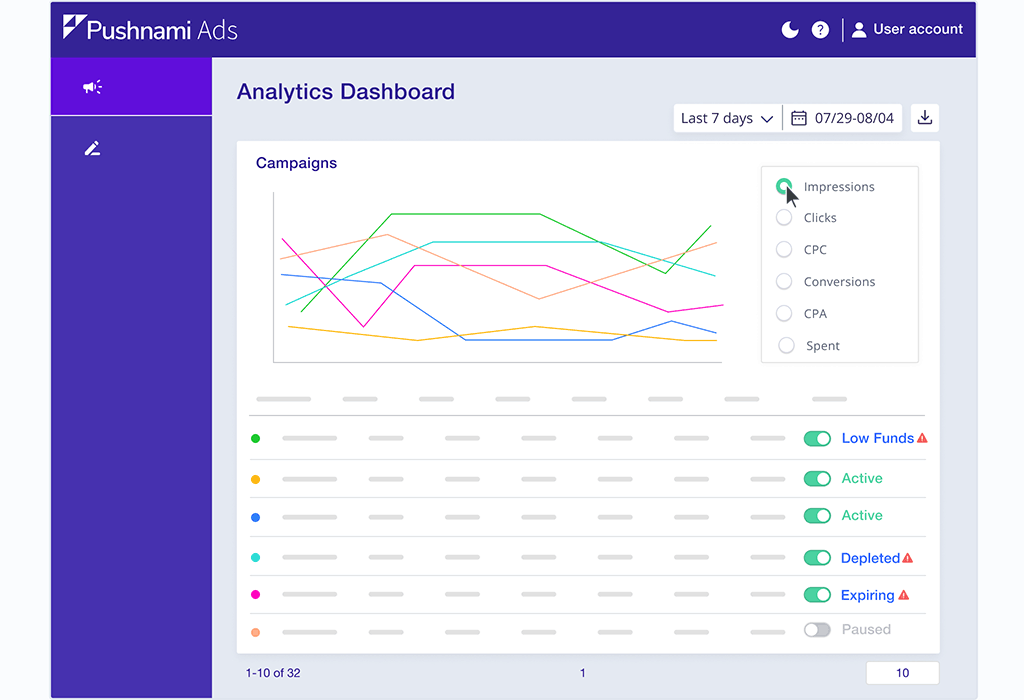
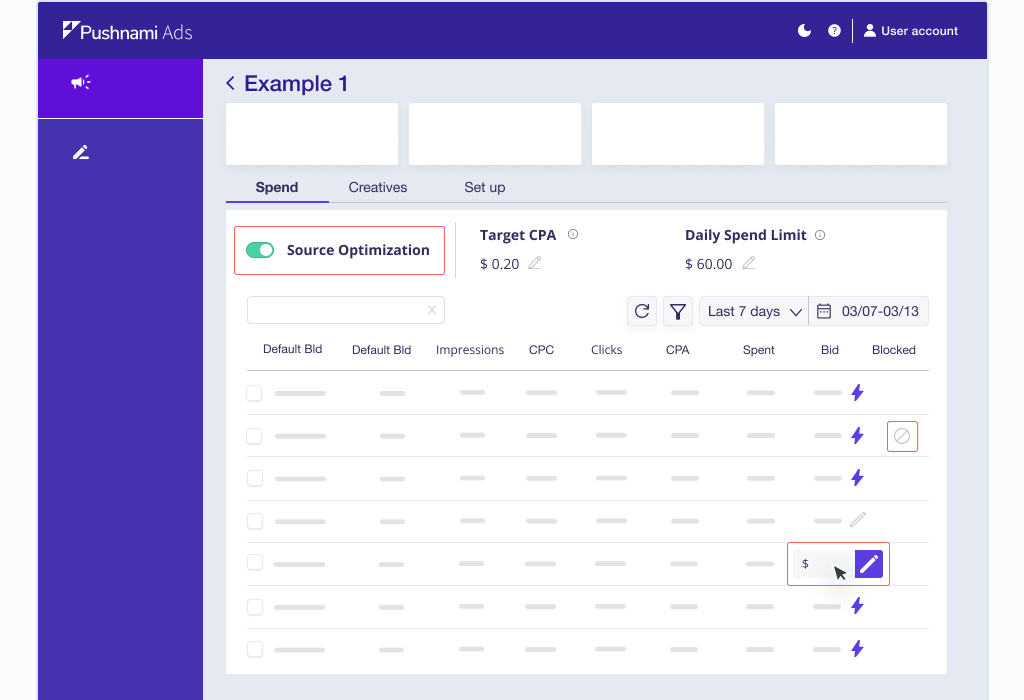
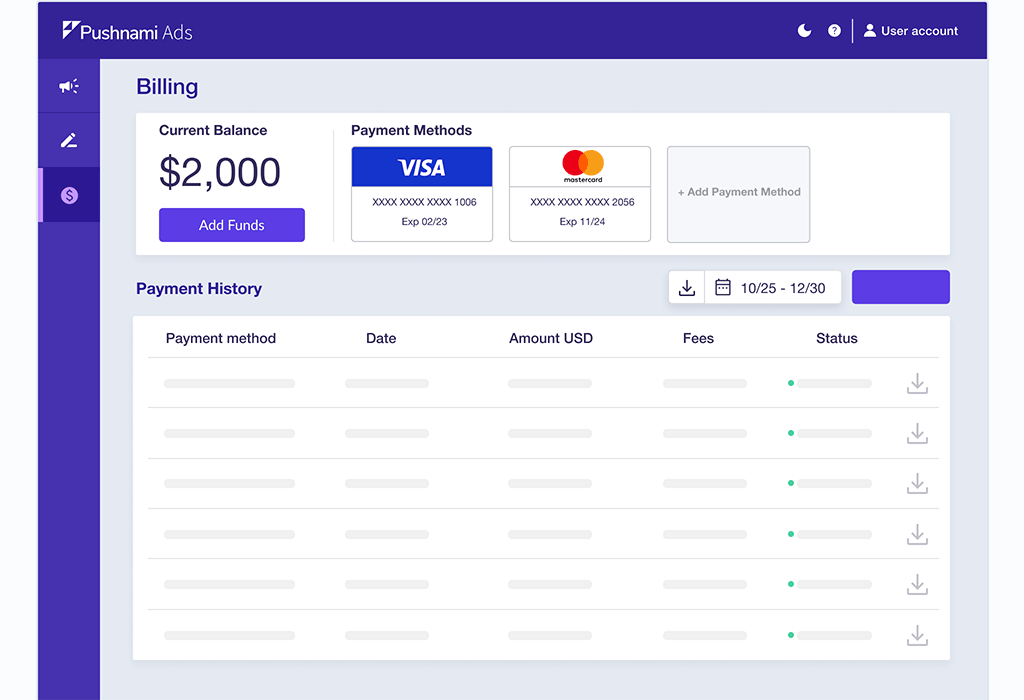
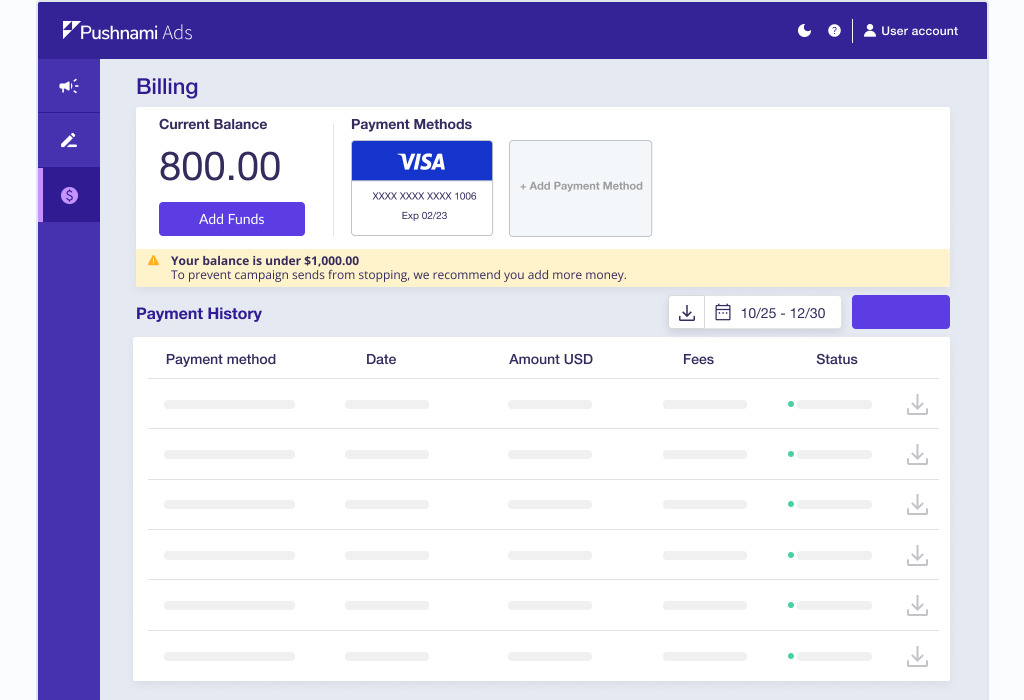
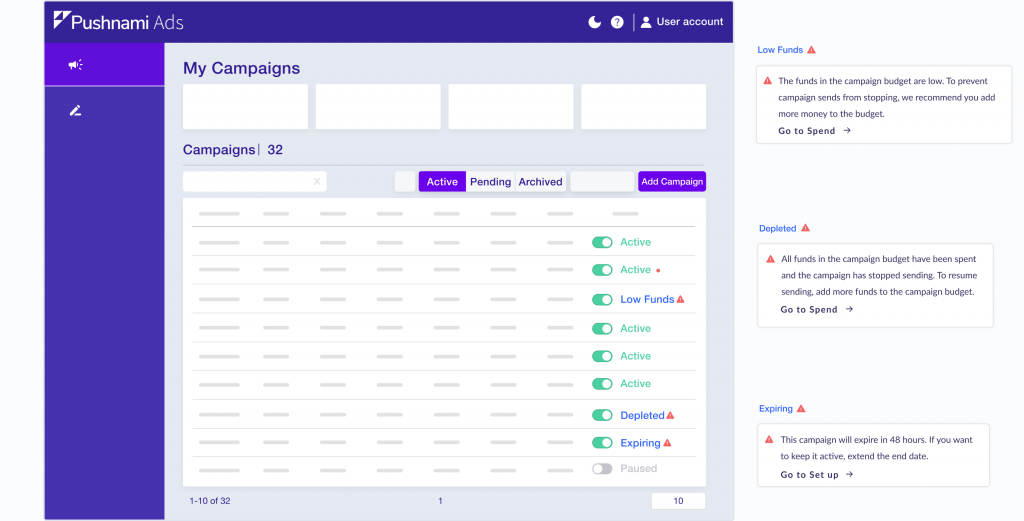
Low Funds |
The campaign is near depleted budget but is still sending on the remaining budget |
|
|
Depleted |
The entire budget for the campaign has been spent and is no longer sending |
|
|
Expiring |
The campaign end date is within the next 48 hours |
|
|
Archived |
The campaign has been moved to archive and is no longer running |
|
|
Frozen |
All campaigns have been paused due to billing issues |


|
|
Low Funds |
The campaign is near depleted budget but is still sending on the remaining budget |
|
|
Depleted |
The entire budget for the campaign has been spent and is no longer sending |
|
|
Expiring |
The campaign end date is within the next 48 hours |


|
|
Active |
The campaign is live and running on the network |
|
|
Pending |
The campaign is currently being reviewed by our content review team to ensure it is compliant with our advertising policies |
|
|
Paused |
The campaign is currently paused and not running on the network |
|
|
Rejected |
The campaign is not running and campaign contents are in violation of our advertising policies. The campaign was terminated on Pushnami’s behalf |
|
|
Pending Start Date |
The campaign will start to run on the network on the entered start date defined in the campaign settings |
|
|
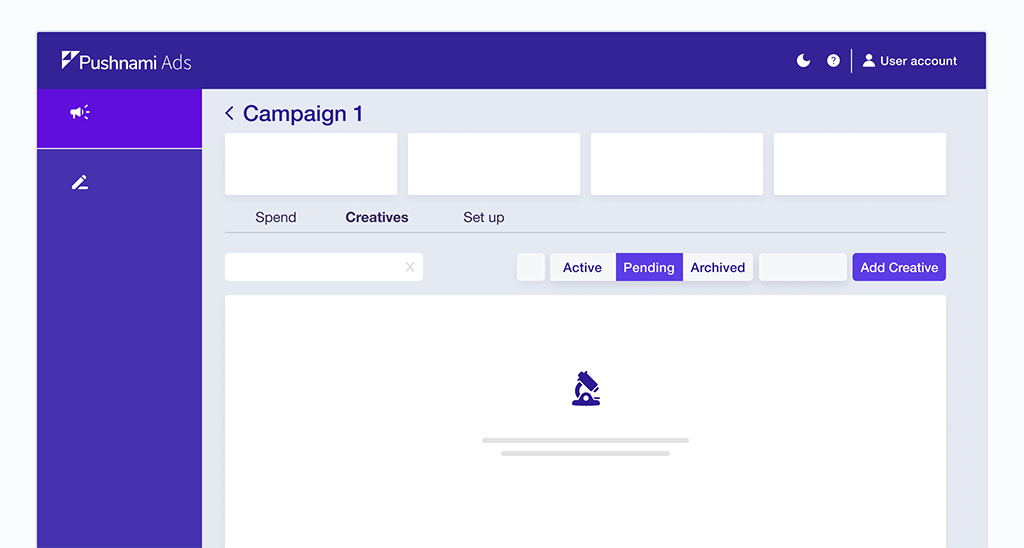
Pending Creatives |
A campaign has been created, but there are no creatives added and therefore not sending |
|
|
Low Funds |
The campaign is near depleted budget but is still sending on the remaining budget |
|
|
Depleted |
The entire budget for the campaign has been spent and is no longer sending |
|
|
Expiring |
The campaign end date is within the next 48 hours |
|
|
Archived |
The campaign has been moved to archive and is no longer running |
|
|
Frozen |
All campaigns have been paused due to billing issues |
|
|
Low Funds |
The campaign is near depleted budget but is still sending on the remaining budget |
|
|
Depleted |
The entire budget for the campaign has been spent and is no longer sending |
|
|
Expiring |
The campaign end date is within the next 48 hours |
|
|
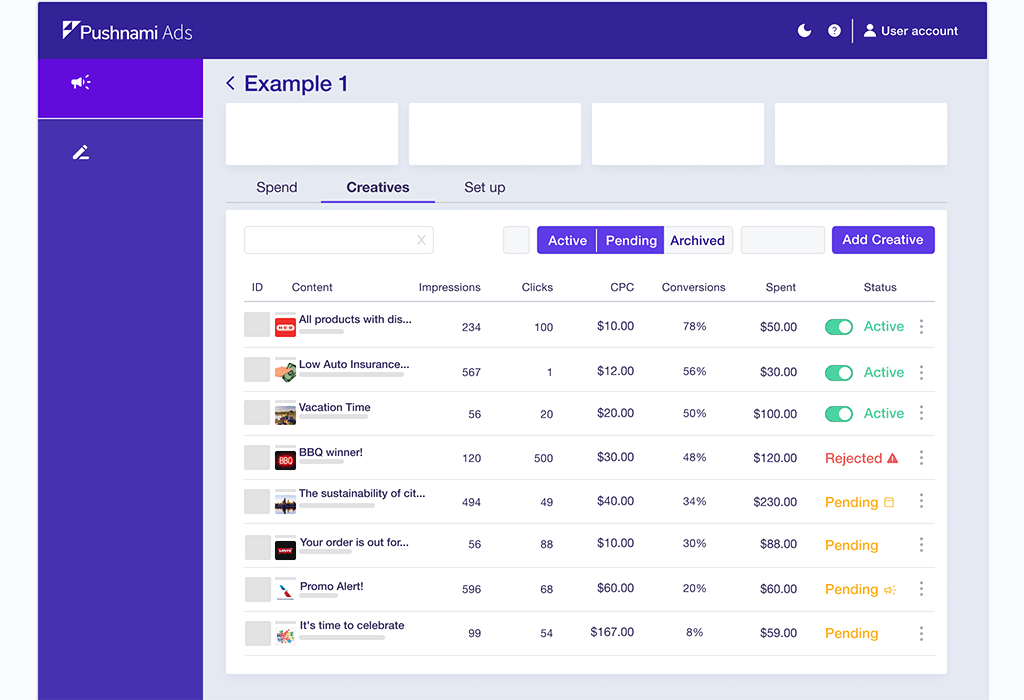
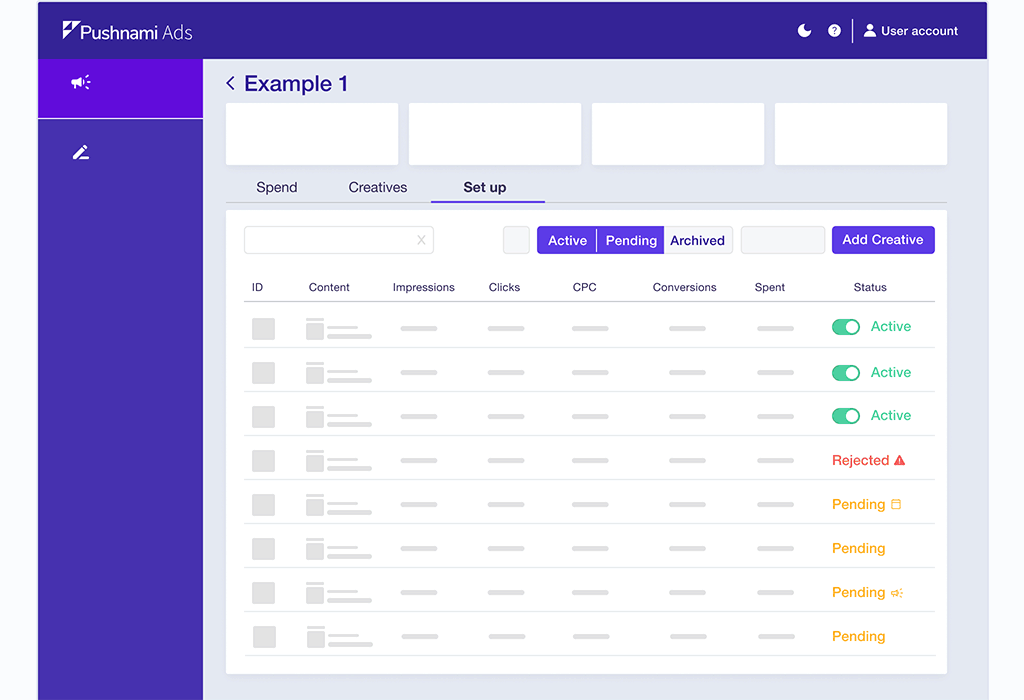
Active |
The campaign is live and running on the network |
|
|
Pending |
The creative is currently being reviewed by our content review team to ensure it is compliant with our advertising policies |
|
|
Paused |
The creative has been manually paused and is not running on the network |
|
|
Archived |
The creative has been moved to archive and is no longer running |
|
|
Rejected |
The creative is not running and campaign contents are in violation of our advertising policies. Please review the feedback and make the necessary changes before resubmitting |


|
|
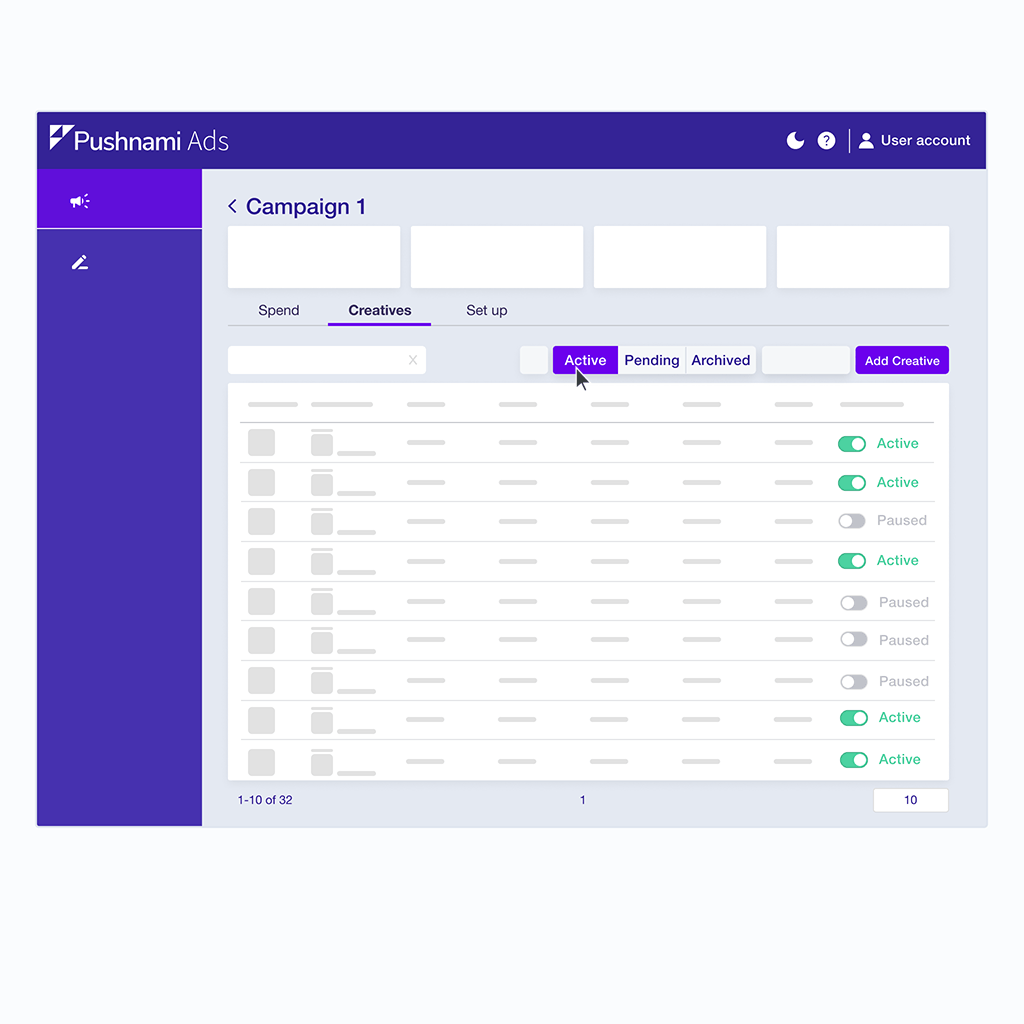
Active |
The campaign is live and running on the network |
|
|
Pending |
The creative is currently being reviewed by our content review team to ensure it is compliant with our advertising policies |
|
|
Paused |
The creative has been manually paused and is not running on the network |
|
|
Archived |
The creative has been moved to archive and is no longer running |
|
|
Rejected |
The creative is not running and campaign contents are in violation of our advertising policies. Please review the feedback and make the necessary changes before resubmitting |