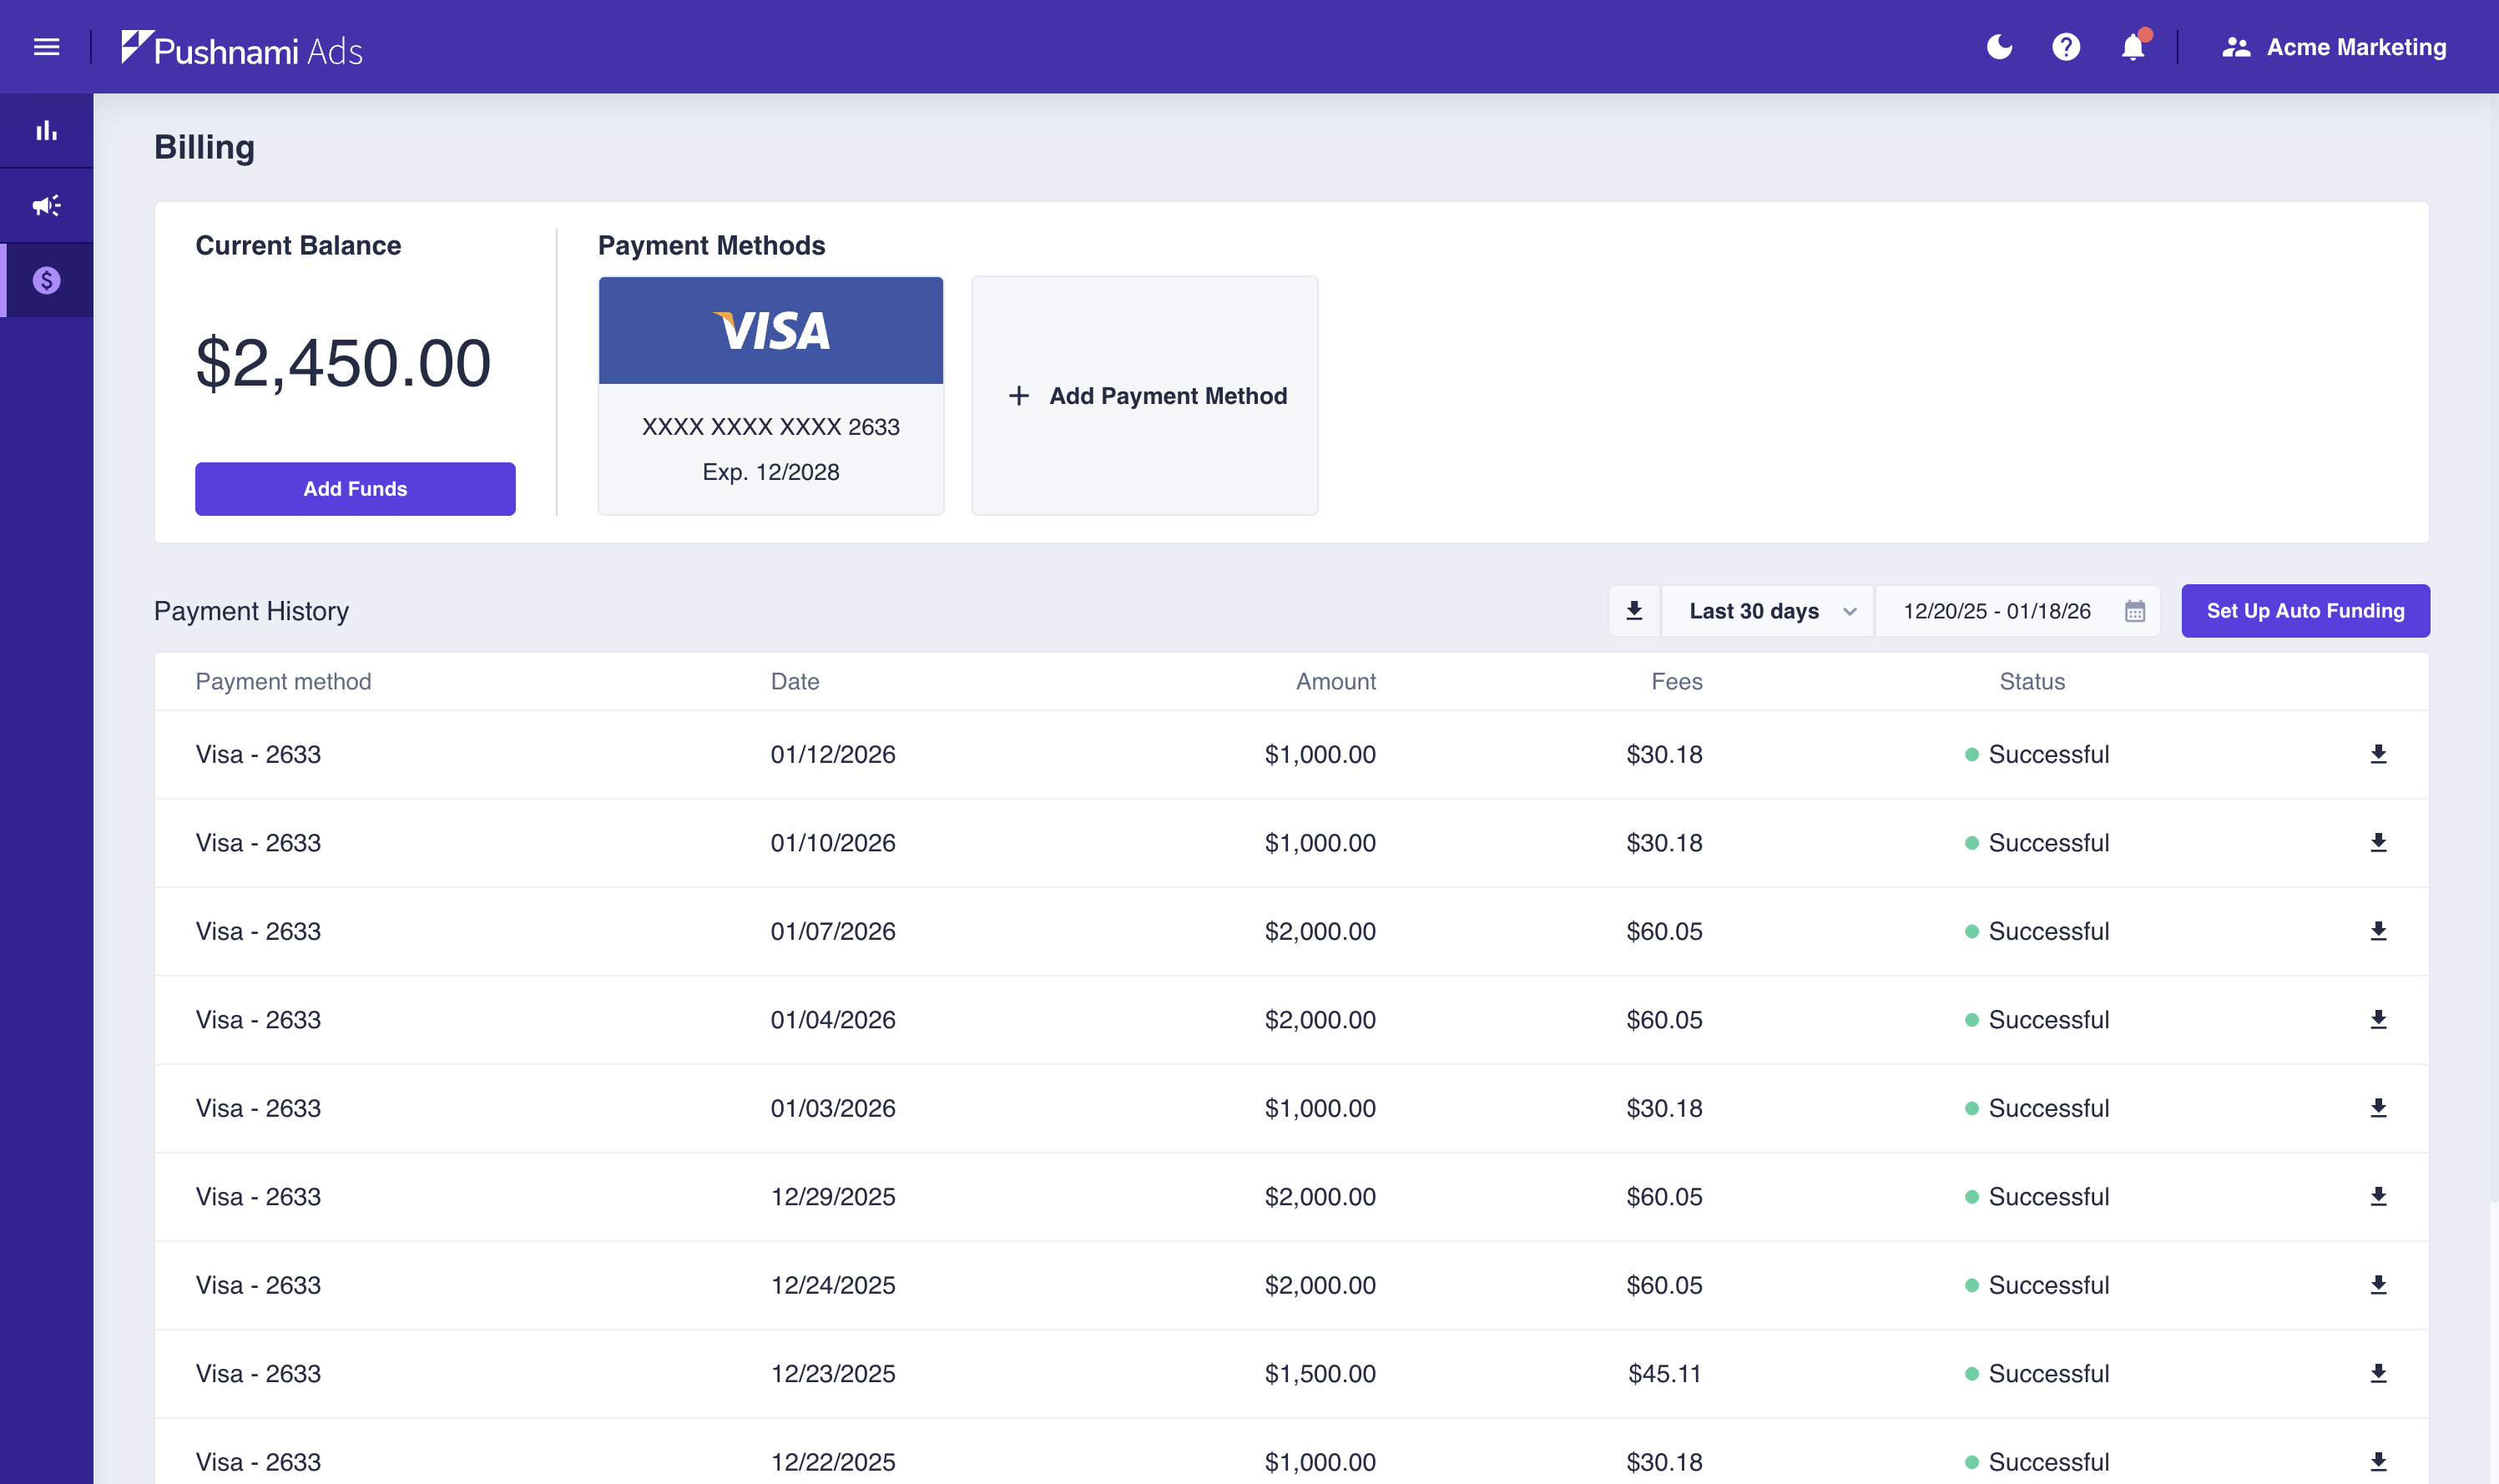
Billing
Running campaigns on the Pushnami Ads network requires maintaining a positive account balance. This guide covers everything you need to know about managing your billing and payments.
Account Balance
Your account balance is displayed on the Billing page and determines your campaign's ability to run:
| Balance Status | Description | Campaign Impact |
|---|---|---|
| Normal | Adequate funds available | Campaigns run normally |
| Low | Below $99 (warning threshold) | Yellow alert displayed |
| Depleted | $50 or below | Campaigns automatically pause |
Getting Started with Billing
First-Time Setup
- Navigate to Billing from the main menu
- Click Add Payment Method
- Enter your credit card details
- Make your first deposit (minimum $1,000)
- Configure Auto-Funding (recommended)
Payment Methods
Pushnami Ads supports multiple payment methods to fund your account.
Available Payment Options
| Method | Description | Best For |
|---|---|---|
| Credit Card | Pay via the self-serve portal | Most advertisers, auto-funding |
| Wire Transfer | Bank-to-bank transfer | High-volume advertisers, agencies |
Credit Card Payments
Credit cards can be added and managed directly in the Pushnami Ads portal.
Adding a Credit Card
- Click +Add Payment Method
- Enter credit card information:
- Card number
- Expiration date
- CVV
- Billing address
- The card is saved and ready to use
Wire Transfer Payments
For high-volume advertisers or those who prefer bank transfers, wire payments are available.
Setting Up Wire Transfers
Wire transfer is arranged through your Pushnami account representative. Contact your rep or email billing@pushnami.com to:
- Request wire transfer setup for your account
- Receive Pushnami's banking details
- Get instructions for including your account reference
Wire Transfer Details
- Processing time: 1-3 business days after funds are received
- Minimum amount: Typically $5,000+ (contact your rep for details)
- Fees: No processing fee from Pushnami (your bank may charge wire fees)
Wire transfers and credit card payments can both be used on the same account. The payment method used for each deposit is at your discretion.
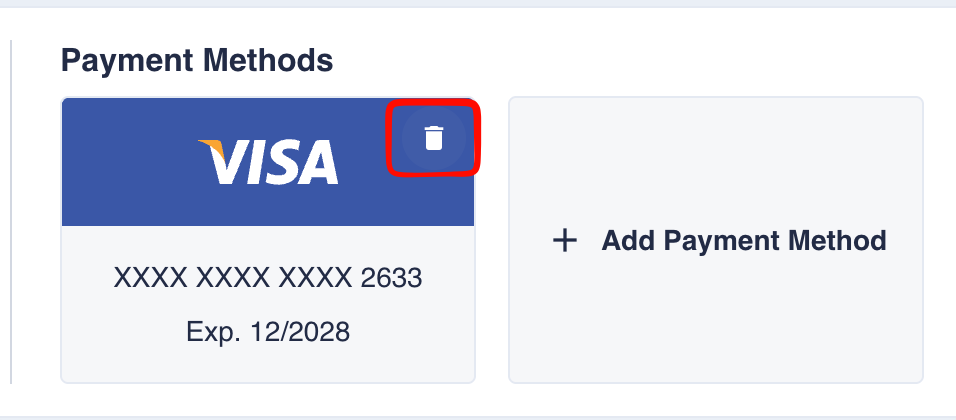
Managing Payment Methods
- Maximum cards: You can store up to 4 payment methods
- Primary card: Set a default card for auto-funding
- All cards: Can be used for manual fund additions
Removing a Payment Method
- Hover over the payment method card
- Click the delete icon in the upper right corner
- Confirm the deletion in the modal
You cannot delete a payment method that is currently set for auto-funding. Disable auto-funding first or assign a different card.
Adding Funds
Manual Fund Addition
- Click Add Funds
- Select which payment method to charge
- Enter the amount to add
- Review the total (including processing fee)
- Click Add Funds to complete
Processing Fee: 2.9% + $0.30 per transaction
Minimum Amounts
- First deposit: $1,000 minimum
- Subsequent deposits: No minimum (practical minimum ~$10 due to fees)
- Daily spend minimum: $0.01 per day
Auto-Funding
Auto-funding automatically adds funds when your balance falls below a threshold, ensuring campaigns never pause due to insufficient funds.
Setting Up Auto-Funding
- Click Set Up Auto-Funding or the edit button
- Enable the auto-funding toggle
- Configure your settings:
- Trigger threshold: Balance level that triggers funding
- Top-up amount: How much to add when triggered
- Payment method: Which card to charge
- Save your settings
Auto-Funding Benefits
- Uninterrupted campaigns - Never pause due to low balance
- Automatic management - No need to monitor balance daily
- Predictable budgeting - Set your top-up amount to match your budget cycle
Disabling Auto-Funding
- Go to Auto-Funding settings
- Toggle auto-funding OFF
- Save the settings
When disabled, you must manually add funds to maintain campaign operation.
We strongly recommend enabling auto-funding, especially for active campaigns. A paused campaign due to depleted funds can miss valuable traffic and require time to rebuild momentum.
Balance Alerts
The system provides proactive alerts about your balance:
Low Funds Alert (Yellow)
Displayed when balance is between $50 and $99:
- Warning indicator on dashboard
- Email notification (if enabled)
- Campaigns continue running
Depleted Alert (Red)
Displayed when balance is $50 or below:
- All campaigns automatically pause
- Prominent alert on dashboard
- Email notification
Resolving Balance Issues
- Add funds immediately
- Campaigns resume automatically once balance is restored
- Consider enabling auto-funding to prevent future issues
Payment History
Viewing Transaction History
The Billing page displays all payment transactions with:
- Date - When the transaction occurred
- Amount - Gross amount charged
- Fee - Processing fee
- Net - Amount added to balance
- Status - Success, pending, or failed
Exporting Payment Data
- Select a date range using the time filter
- Click the Download button
- Receive a CSV file with detailed transaction history
Downloading Invoices
- Select a transaction
- Click the Download button
- Receive a PDF with the invoice

Billing FAQ
When are funds deducted?
Funds are deducted in real-time as your campaigns receive clicks. Your balance updates continuously throughout the day.
What happens if a payment fails?
If an auto-funding charge fails:
- You receive a notification
- The system retries with the same card
- If still failing, campaigns may pause when balance depletes
- Add funds manually or update your payment method
Can I get a refund?
Contact support@pushnami.com to discuss refund options for unused account balance.
Are there spending limits?
- Daily spend limit: Set per-campaign in campaign settings
- Account limit: No maximum account balance
- Per-charge limit: Contact support for high-volume needs
What currency is used?
All amounts are in US Dollars (USD).
Troubleshooting
Payment Declined
If your payment is declined:
- Verify card details are correct
- Ensure sufficient credit/funds on the card
- Check if your bank is blocking the transaction
- Try a different payment method
- Contact your bank if issues persist
Missing Balance
If funds don't appear after payment:
- Wait a few minutes for processing
- Check payment status in Payment History
- Verify the charge on your card statement
- Contact support if balance hasn't updated after 15 minutes
Need Help?
For billing questions or issues, contact support@pushnami.com or reach out to your Pushnami account representative.